Thursday, July 12, 2007

Eye Candy, Adobe Photoshop Plug-in

Eye Candy is the top of photoshop plug-in, you can install after main program. Today i'll show you how to install Eye Candy plug-in.

How to install plug-in

  1. After double click install file you’ll see welcome screen.

    welcome-screen

    Click Next button.
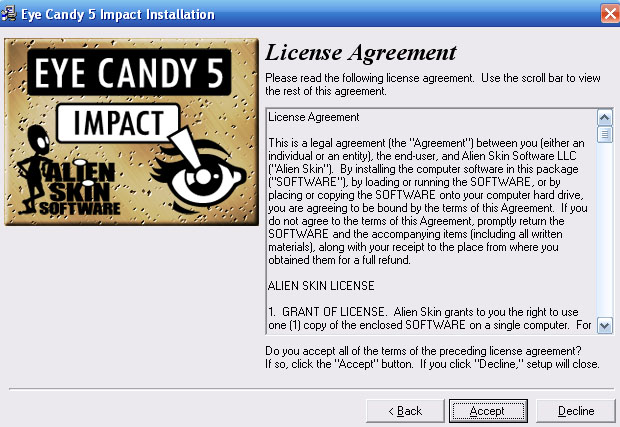
  2. Read the license agreement and click Accept button.

    license-agreement
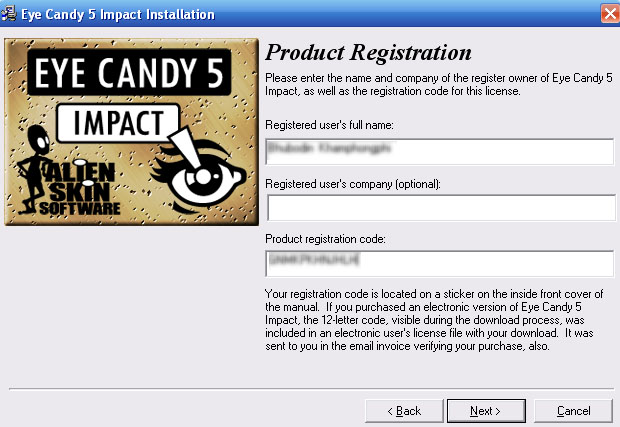
  3. Enter the Name and Product Registration Code in fill from.

    product-registration

    Click Next button.
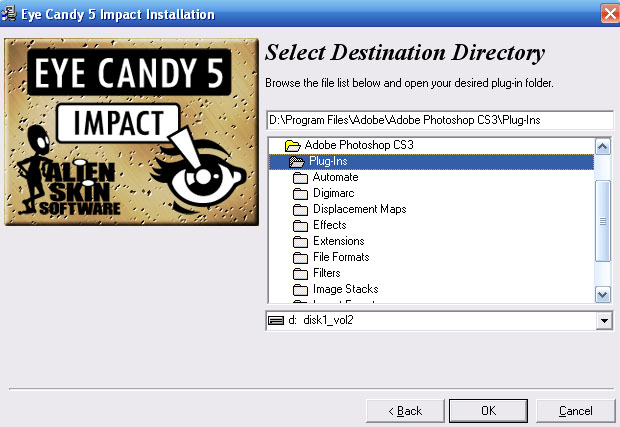
  4. Browse the file list and open your directory plug-in folder (C:\Program File\Adobe\Adobe Photoshop\Plug-ins). Click OK button.

    select-destination-directory

    Waiting for installing.

    installing
  5. When installation has been completed. Click the Finish button to exit.

    inatallation-completed

How to use plug-in

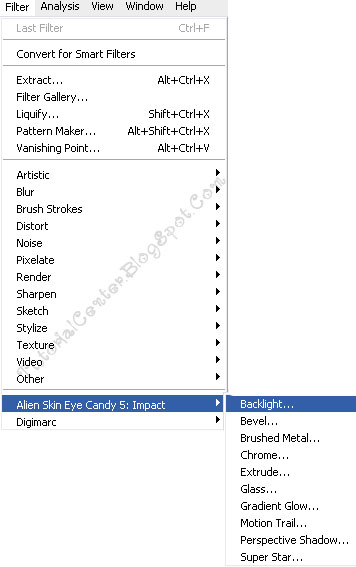
When you want to use Eye Candy Plug-in, you can choose Filter and select Alien Skin Eye Candy from drop-drown menu.

How to used eye candy

You can download demo Alien Skin Eye Candy from: www.alienskin.com

AddThis Social Bookmark Button

Sunday, July 1, 2007

Painting with gradients and patterns

In addition to process and spot colors, the Swatches panel can also contain pattern and gradient swatches. Adobe Illustrator CS3 provides sample swatches of each type in the default panel and lets you create your own patterns and gradients. Click on the buttons at the bottom of the panel to see all swatches or specific types of swatches.

Click on the buttons at the bottom of the panel to see

  1. Choose Window > Workspace > [Panel].
  2. Choose Select > Deselect.
  3. Choose Window > Gradient if your Gradient panel is not visible. Choose Show Options from the panel menu. Click once below the gradient slider at the bottom of the panel to make the color stops visible.

    The Gradient Ramp with a color stop at either end.

    The Gradient Ramp with a color stop at either end

    You can create your own gradient by activating the color stops on the gradient slider, or by dragging existing swatches directly on top of the existing gradient color stops.
  4. In the Swatches panel, click and hold down on the color Dark Orange, don't release. Then drag the swatch on top of the black color stop on the right side of the gradient slider. If you miss the color stop, another stop may appear below the gradient slider. Choose Edit > Undo Gradient and try again.
  5. Select the CMYK Yellow swatch and drag it onto the white color stop on the left side of the gradient slider.
  6. Choose Radial from the Type menu in the Gradient panel.

    Drag the swatch onto the color stop.

    Drag the swatch onto the color stop

    Change to radial.

    Change to radial
  7. Click on the New Swatch button at the bottom of the Swatches panel, and name this background gradient in the New Swatch dialog box. You could also drag the swatch from the Gradient panel (in the upper left corner of the panel) directly into the Swatches panel.
  8. Click the Layers panel tab to reveal the layers panel. Click in the Visibility column to the left of the Background layer to display the contents.
  9. With the Selection tool, click the stroke of the large rectangle in the background (it is larger than the artboard). Click the Fill color in the Control panel and choose your new background gradient. The gradient has been applied.
  10. Select one of the stars in the center of the artboard. Since these are part of a group, all become selected.
  11. Click on the Fill box in the Control panel, and apply the background gradient to the stars. Change the Stroke color in the Control panel to None. Now you will reverse the colors of the gradient, swapping the orange and the yellow.
  12. In the Gradient panel, Alt (Windows) or Option (Mac) drag the left color stop (the yellow color) to the right until you are over the orange color stop on the right and release.

    The gradient ramp should reverse. If it doesn't reverse, choose Edit > Undo and try again. From the Swatches panel, try dragging a darker orange onto the orange swatch onto the orange color stop on the left of the gradient ramp.
  13. Select the Gradient tool and position the pointer in the center of the stars. Click and drag from the center of the artboard to the outer edge of the group of stars.

    Notice that the Gradient is now smoothly transitioned through all stars, as though they are one object.
  14. Choose Select > Deselect.
  15. Choose File > Save.

AddThis Social Bookmark Button

Editing Live Paint regions

Once you've made a Live Paint group, each path remains fully editable. When you move or adjust a path's shape, the colors that had been previously applied don't just stay where they were, like they do in natural media paintings or image editing programs. Instead, Illustrator automatically reapplies them to the new regions that are formed by the edited paths.

To experience this feature further, create a blank new file on which you will create a simple illustration.

  1. Using File > New, create a new letter-sized document. Leave at the default settings, and choose OK.
  2. On the blank document, use the Ellipse tool to create a circle anywhere on the artboard. The size of the circle shape is not important.
  3. Using the Selection tool, hold down the Alt (Windows) or Option (Mac OS) key to clone the circle shape, drag it so the duplicated circle is overlapping the initial circle shape.
  4. Choose Select > All. Choose None from Fill in the Control panel, and then choose None from Stroke color in the Control panel.

    Create two overlapping circle shapes. Paint both the Fill and Stroke None.

    Create two overlapping circle shapes. Paint both the Fill and Stroke None
  5. Select the Live Paint Bucket tool, and cross over the center overlapping area; when it becomes highlighted, click once to activate the center shape as a Live Paint group.
  6. Select a color from the Swatches panel and click on the center Live Paint object to color it.
  7. Select a color. Then using the Live Paint Bucket tool, click the left Live Paint object and click inside of it. Repeat this with a different color for the right Live Paint object.

    Assign different colors to the Live Paint objects.

    Assign different colors to the Live Paint objects
  8. Choose Select > Deselect. Choose the Direct Selection tool. Select and reposition one of the circles, keeping some of the overlap. Notice that the intersecting area is dynamic. It changes the fill based upon the relationship of the two circles.

    You can use the different selection tools depending on what you want to select and affect in a Live Paint group. For instance, use the Live Paint Selection tool to apply different gradients across different faces in a Live Paint group, and use the Selection tool to apply the same gradient across the entire Live Paint group.
  9. Choose File > Close. Choose to not save the file.

AddThis Social Bookmark Button

Applying the pattern in Illustrator CS3

  1. With the Selection tool, select the red rectangle beneath the "Aquo Life" text in the poster.

    You can assign the pattern using a number of different methods. In this instance you will use the Swatches panel to apply the pattern. You could also apply the pattern using the Fill color in the Control panel.
  2. Click on the Fill box in the Tools panel, then in the Swatches panel, click on the dots pattern swatch you created.

    The pattern is applied to the fill of the red rectangle.

    The pattern is applied to the fill of the red rectangle
  3. Select the rounded rectangle used to create the pattern (off the right edge of the artboard), and press Delete, as you will no longer need the original.
  4. Using the Selection tool, select the red rectangle and choose 2 pt from the Stroke Weight menu in the Control panel.
  5. Click the Stroke color in the Control panel and choose CMYK Red from the Swatches panel.
  6. Click the word Stroke in the Control panel and change the stroke to apply to the inside of the path.
  7. Choose File > Save.

    The result.

    The result applying patterns

Editing the pattern

Perhaps you have used a pattern several times in an illustration and want to update its contents. Not a problem, just follow these steps:

  1. Using the Selection tool, click and drag the dots pattern swatch you created from the Swatches panel to an empty location on the artboard. The rounded rectangle returns to your artboard.
  2. Choose Select > Deselect, and choose the Direct Selection tool ( ). Select the rounded rectangle.
  3. Click the Stroke color in the Control panel, and select CMYK Red for the rounded rectangle. You will create a tint of the CMYK Red using the Color panel.
  4. Choose Window > Color if the Color panel is not visible, and make sure the Stroke color is selected in the Color panel. With the rounded rectangle still selected, hold down the Shift key, and drag either the Yellow or Magenta slider to create a "tint" of this color. Notice that when you hold down the Shift key, the sliders move relative to each other. Use this method to create a lighter red color; an exact tint is not necessary.

    Color panel is not visible
  5. Using the Selection tool, select the rounded rectangle and hold down the Alt (Windows) or Option (Mac OS) key while dragging it back on top of the existing pattern Swatch called dots. The pattern is updated.

    Dragging it back on top of the existing pattern Swatch called dots
  6. Select the rounded rectangle that you edited to create the updated pattern and delete it.
  7. Choose File > Save.

AddThis Social Bookmark Button

Creating your own pattern in Illustrator CS3

In this tutorial you will create your own custom pattern and add it to the Swatches panel. You will then discover how to edit an existing pattern and update it in the Swatches panel. If your Swatches panel is not visible, choose Window > Swatches.

For this section, you will assign colors using the Tools panel.

  1. Click the Fill box at the bottom of the Tools panel to make sure it is forward. It does not matter if it shows the last used color.

    Make sure Fill box is selected before applying color.

    Make sure Fill box is selected before applying color
  2. With the Fill box selected, choose the CMYK Red swatch from the Swatches panel.
  3. Press the "X" key to swap the Fill and Stroke in the Tools panel. When the Stroke box is selected, choose None by clicking the None button at the bottom of the Tools panel.
  4. In the Tools panel, click on the Rectangle tool, hold down the mouse button to view the hidden tools, and then select the Rounded Rectangle tool. Click once off of the right edge of the Artboard (do not click and drag!). In the Rounded Rectangle dialog box, enter .7 in in the Width text field, .7 in in the Height text field, and .3 in in the Corner Radius text field and click OK.

    Enter values in the Rounded Rectangle dialog box.

    Enter values in the Rounded Rectangle dialog box

    The result.

    The result of patterns

    A red rounded corner square appears. Using the Selection tool, position it off the artwork if it is touching any of your existing illustration.
  5. Click on the Swatches panel tab to reveal the Swatches panel. With the Selection tool, click and drag the selected rounded rectangle into the Swatches panel. You have created a new pattern.

    Drag shape into the Swatches panel.

    Drag shape into the Swatches panel

    Double-click on the new pattern swatch to name it.

    Double-click on the new pattern swatch to name it

AddThis Social Bookmark Button

Saving a Selection as a Mask

Quick masks are temporary. They disappear as soon as you deselect. However, you can save a selection as an alpha-channel mask so that your time-consuming work won't be lost, and you can reuse the selection in this work session or a later one. You can even use alpha channels in other Photoshop image files.

To avoid confusing channels and layers, think of channels as containing an image's color and selection information; think of layers as containing painting and effects.

  1. With the (Standard mode) statue selection still active in the image window, click the Save Selection As Channel button at the bottom of the Channels palette.

    Click the Save Selection As Channel button at the bottom of the Channels palette

    A new channel, Alpha 1, appears at the bottom of the Channels palette.
  2. Double-click the Alpha 1 channel, type Statue to rename it, and press Enter or Return.

    Double-click the Alpha 1 channel


    When you select the channel, Photoshop displays a black-and-white representation of the selection in the image window, and it hides all the color channels.
  3. Choose Select > Deselect to deselect the statue.
  4. Choose File > Save to save your work.

AddThis Social Bookmark Button