
The Control panel
The Control panel (Window > Control) offers quick access to options, commands, and other panels related to the current page item or objects you select (this is called context-sensitive). By default, the Control panel is docked at the top of the application window (Windows) or screen (Mac OS); however, you can dock it to the bottom of the application window (Windows) or screen (Mac OS), float it, or hide it altogether. When text in the Control panel is blue and underlined, you can click the text to display a related panel. For example, click the word Stroke to display the Stroke panel.
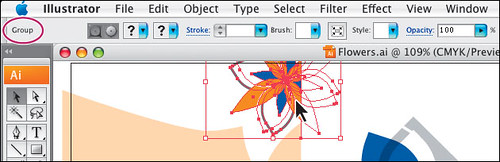
1. Take a look at the Control panel located below the menus. With the Selection tool, click the middle of orange/blue flower at the top, left of the page. Notice the Control panel information. "Group" appears on the left side of the Control panel as well as the Stroke, Style, Opacity, etc. of that group of objects. Choose Select > Deselect so the group is no longer selected.
2. With any tool, click the light gray bar on the left side of the Control panel, hold down and drag into the workspace. A vertical bar should be visible on the left side of the Control panel for you to move it. The Control panel can be docked on the top of the workspace again or at the bottom of the workspace or float freely.
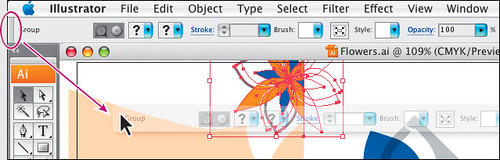
3. Click the left side of the Control panel (the gripper bar) and drag it back to the top of the workspace below the menus. A blue line will appear telling you that it will be docked when you let go.
Working with panels
Panels give you quick access to many of Illustrator's tools, which make modifying artwork easier. By default, some of the panels are docked and appear as icons on the right side of the workspace.
1. Choose Window > Workspace > [Basic] to reset the panels to their original location.
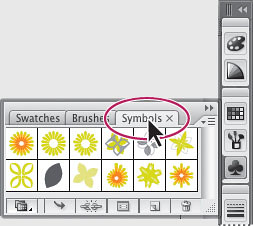
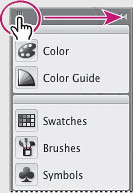
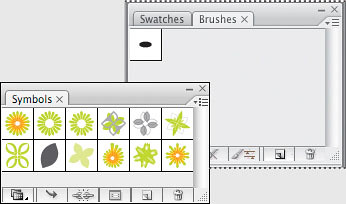
2. Click the Swatches panel icon ( ) to expand the panel, or choose Window > Swatches. Notice how the Swatches panel appears with two other panels (Brushes and Symbols). They are all part of a panel group. Click the Symbols panel tab to expand the Symbols panel. Try clicking other panel icons like the Color panel (
 ). Notice how a new group appears, closing the group that contained the Swatches panel.
Click the Swatches icon to show the Swatches panel.

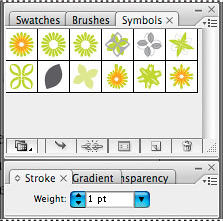
Click the Symbols tab to show the Symbols panel.
3. Click the Symbols panel tab (or whichever panel is showing) to collapse the panel back to its icon.
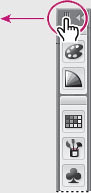
4. Click the double arrow at the top of the dock to expand the panels. Click the double arrow to collapse the panels again.
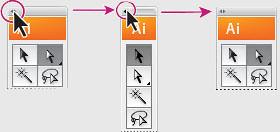
5. To change the width of all the panels in a dock, drag the gripper ( ) at the top of the dock to the left until text appears. To undo what you just did, click the gripper () again and drag to the right until you can drag no further.
Click and drag to change the width.
Click and drag back to put it back.
The result.

6. Choose Window > Workspace > [Panel] to expand the panels. You are now going to resize a panel group. This can make it easier to see more important panels. Click the Symbols panel tab and drag the dividing line between the Symbols panel group and the Stroke panel group down to resize the group.

Next you'll reorganize a panel group.
7. Drag the Symbols panel tab outside the group to remove the panel from the dock.
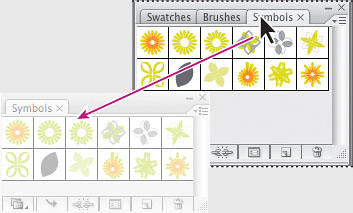
Drag the panel tab to separate from the group.
The result.

You can also move panels from one panel group to another to create custom panel groups of the panels you use most often. Next you'll organize the panels to create more space in your work area.
8. You can double-click the tab containing the name of the panel to reduce the size of the panel. Double-click the tab again to minimize the panel. This can also be done when a panel is docked.
Customizing your workspace
You can reset your panels and Tools panel to their default position. You can also save the position of panels and easily access them at any time by creating a workspace. Next you will create a workspace to access a group of commonly used panels.
1. To reset the workspace back to the default settings, choose Window > Workspace > [Basic].
Next you'll open some panels, align them on the side, and save the workspace.
2. Choose Window > Align and position the group of panels so that they are all visible on the left side of the screen, below the Tools panel.
3. Choose Window > Workspace > Save Workspace. The Save Workspace window opens. Enter the name Navigation, then click OK.
4. Return to the default panel layout by choosing Window > Workspace > [Basic]. Note that the panels return to their default positions. Toggle between the two workspaces using the Window > Workspace command and selecting the workspace you wish to use; return to the [Basic] workspace before going on to the next exercise.
Using panel menus
Most panels have a panel menu in the upper-right corner of the panel. Clicking this button ( ) opens a menu with additional commands and options for the selected panel. You can use this to change options for the panel display or to access additional commands relating to the panel.
Next you will change the display of the Symbols panel.
1. Click the Symbols panel icon on the right side of the workspace. You can also choose Window > Symbols to display this panel.
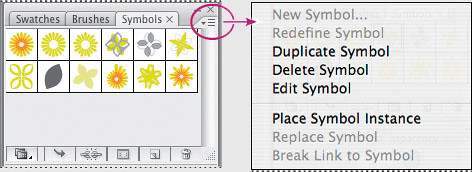
2. Position the cursor on the panel menu () in the upper-right corner of the Symbols panel, and click to display the panel menu.
3. Choose Small List View from the panel menu. This shows the symbols as a list with a thumbnail, allowing for you to see the name of the symbol as well as the thumbnail. This command affects only the Symbols panel rows, not the other panels visible on the screen. The commands in the panel menu apply only to the active panel.
4. Click the Symbols panel menu, and choose Thumbnail View to return the symbols to their original view. Click the Symbols panel tab to hide it again.
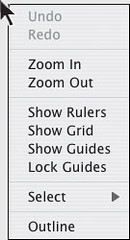
In addition to the panel menus, context-sensitive menus display commands relevant to the active tool, selection, or panel.
To display context-sensitive menus, position the pointer over the artwork, panel list, scrollbar, or Document magnification level. Then click with the right mouse button (Windows) or press Ctrl and hold down the mouse button (Mac OS).
Options for a context-sensitive menu.


1 Comments:
Cool tutorial, I'm just learning how to use it, this is very helpful, thanks for the post.
Post a Comment