
In this tutorial, you will learn how to correctly locate and select objects using the Selection tools, as well as how to protect others by hiding and locking them.
Using the Selection tool
1. Select the Selection tool in the Tools panel. Position the cursor over the different shapes without clicking. Note the icon that appears as you pass over objects, indicating that there is an object that can be selected under the pointer. Click the black airplane in the upper left corner. A bounding box with eight handles appears.
The bounding box.
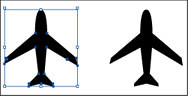
The bounding box is used for transformations such as resizing and rotating; it also indicates that this item is selected and ready to be edited. This could mean changing its size, color, position, or any number of other things. The color of the bounding box also indicates which layer the object is on "Working with layers."
2. Using the Selection tool, click the airplane to the right and notice that the first airplane is now deselected and only the second airplane is selected.
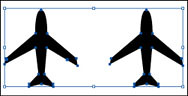
3. Add another airplane to the selection by holding down the Shift key and clicking the first airplane. Both airplanes are now selected.
Add other items to a selection by holding down the Shift key.
4. Reposition the airplanes anywhere on the document by clicking in the center of either selected airplane and dragging. Since both are selected, they travel together.
5. Deselect the airplanes by clicking the artboard where there are no objects. If you prefer, choose Select > Deselect.
6. Revert to the last saved version of the document by pressing the F12 key or choose File > Revert. In the Revert dialog box, click Revert.


0 Comments:
Post a Comment